Transform A Boring Exterior Side Door Space With A Stylish Paver Walkway Project
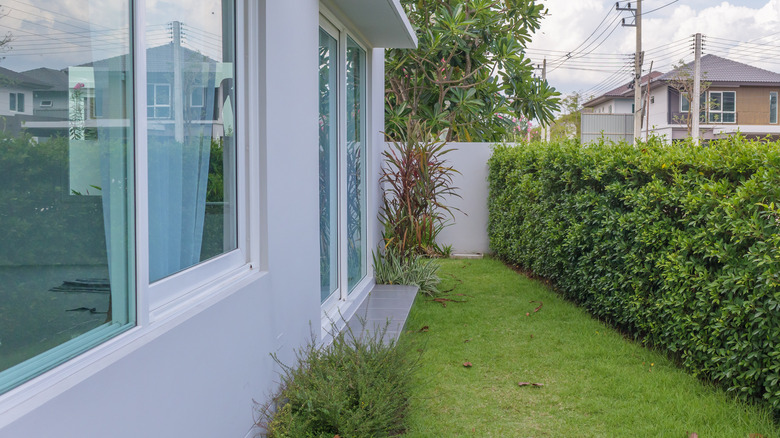
If you're looking for ways to make the most of your outdoor space, your first thought might be to completely revamp your landscaping or install a brand-new patio. While these large projects are sure to make a lasting impact, not everyone has the time or money to undergo such a large renovation. Thankfully, there are smaller changes you can make that can create a massive difference in the look of your outdoor space, like this creative paver walkway DIY.
If you have an awkward space along the side of your home that's itching for a transformation, consider trying out this simple idea. For less than $200, you can DIY a fashionable, sturdy, and fully customizable walkway, all without the use of any expensive tools or difficult techniques. After picking up your materials, you could easily complete this project over the course of a weekend, making it the perfect choice if you're on the hunt for a simple change that will boost your home's curb appeal on a budget.
What you'll need to prepare
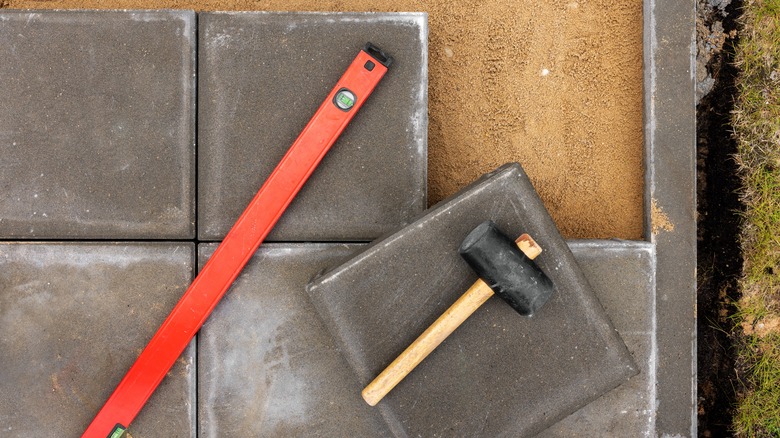
First, you're going to need to gather your materials. Because you'll be completing all of the labor yourself, this is where you can really customize your budget and decide exactly what kind of investment you want to make. You'll need a few basic items to start: sand, a shovel, a rake, filler rocks, weed fabric, pavers, and some metal trim, if desired. The specifics of this project are completely up to you, so feel free to shop around for pavers and rocks that align with your personal style, fit your budget, and match the other accents in your outdoor space.
After gathering your supplies, it's time to get to work. You'll want to begin by measuring out the space for your walkway, then digging up a shallow layer of dirt in the area. Once the dirt is exposed, level the surface with the rake and remove any rocks or excess material that could cause bumps. After everything is looking smooth, you can move on to the actual installation of this DIY walkway.
How to complete this paver DIY
Now that you have a level patch of dirt to act as the base of your walkway, it's time to start building. Cut and lay down a layer of weed fabric to prevent anything from springing up through the walkway, then install the metal barrier around the edges for a cleaner look, if desired. Once everything is looking smooth, pour a thin layer of sand over the fabric and spread it out until it's level. This will provide a stable base for the pavers so they don't migrate over time.
Now, it's time to get creative. Lay out your pavers in your desired pattern, making sure the spacing is consistent throughout. If you have the tools handy, you can also cut down the pavers to fill in gaps along the sides and corners, but this is a matter of personal preference. Once everything is in position, all that's left to do is fill in the empty space with rocks.
While this DIY certainly still requires some time and effort, it's a relatively easy way to spruce up your outdoor space on a budget. As an added bonus, it's also easy to modify down the line. If you decide you want to change up the look, all you have to do is remove the rocks and pavers and replace them with a new pattern. It's low-risk, customizable, and beginner-friendly. What's not to love?