Use Wood Pallets To Give Your Mailbox A Stunning Upgrade On A Budget
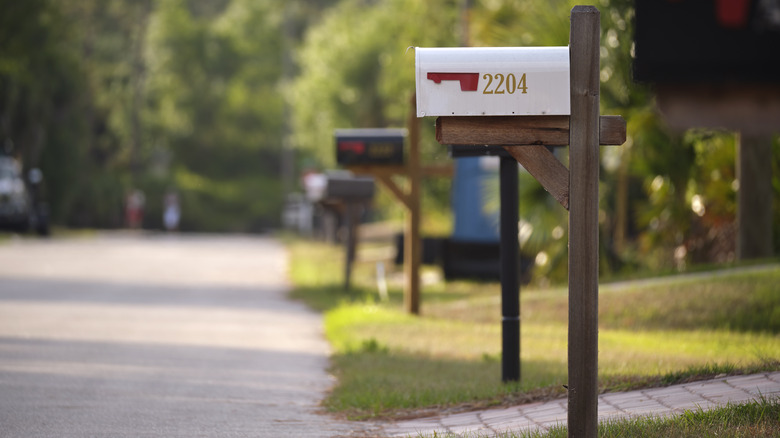
Whether your mailbox has begun to age and doesn't look its best or you're searching for creative ways to increase your home's curb appeal, this DIY project is great for making your mailbox look new again. With just some wood pallets, a saw, a nail gun or a drill, spray paint, and some wood stain, you can add onto the post your mailbox already sits on to make it look more chic and modern. For those that have a flat mailbox that hangs on the wall of your porch, you can use pallets to give it a rustic backing and could also add decorations to it.
Since there are tons of places to find free pallets, like retail stores, and you won't need to buy a new mailbox, this project shouldn't be too costly; however, it may take a bit of time to complete depending on how DIY savvy you are. By taking apart the pallets and using the wood to craft your mailbox post or backboard, you can save money while making your home more beautiful.
Upgrading your mailbox with wood pallets
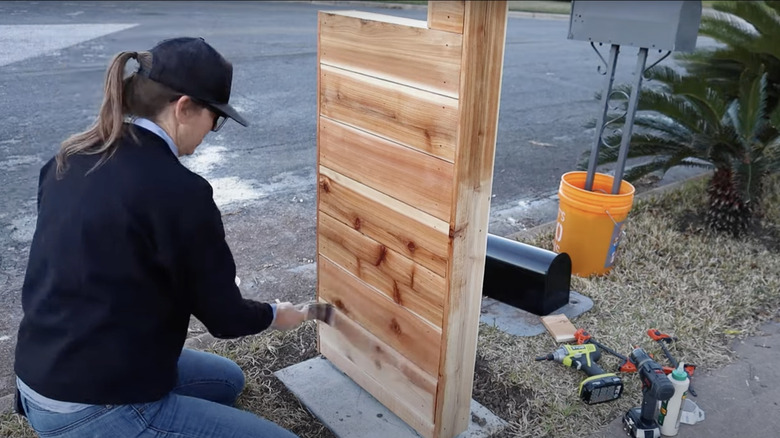
To start creating a new, decorative post for your mailbox, totally disassemble your pallets. Measure the height and width of your current mailbox post. This will give you a guideline for how you'll need to cut your wood to ensure it fits properly. Using the thinner pieces of wood that previously held the pallet together, make a rectangular frame, but allow the two long sides to extend further than the bottom. This will support the front of your mailbox and connect it to the ground. This can easily be done by nailing, screwing, or gluing the pieces together (make sure you're using wood glue rated for outdoor use). With similar cuts of wood, make another three-sided, U-shaped structure to go over your original post, covering the top and the two outer sides. Insert your first frame into the ground at the front of your mailbox and ensure your back frame is long enough to do the same.
Spray paint your new post black, white, or whatever color matches your mailbox. Now, you can take the wider pieces of wood from the pallet and attach them horizontally across your structure all the way around. Cut the wood to the proper length to connect your previous structures and cover the ends of your posts. You may choose to have small or medium gaps between your planks, or have them right up against each other depending on your style. Do this to all four sides of your post. It's important to make sure the planks line up with those on the adjoining sides. This gives it a clean, professional look.
Finishing your stunning upgraded mailbox
Once your post is constructed, you can use wood stain or a finish like varnish or a clear weatherproof sealant to give it a better look. Alternatively, you could paint your mailbox structure to be uniquely your style. Now, you might place your house number on the side of the post or leave it as is. For those with hanging mailboxes, this upgrade won't be possible, but you can still use wood pallets to enhance your mailbox by crafting a backboard. This project will also require you to take the pallets apart.
Lay out three of the wider planks of wood next to each other to see how big your backboard will need to be. If it needs to be wider, you can add another plank, or if it needs to be shorter you can saw all of the pieces to the appropriate length. Now, cut two more small planks to attach perpendicularly to your boards with nails, screws, or wood glue to secure them together. Paint or stain your board if you wish before screwing on your mailbox. Adding house numbers or a small metal planter to the bottom of the board can also help make it more beautiful. With these simple projects, you can give new life to your old mailbox without breaking your budget.