The Best Way To Cut Circles In Wood For Your Home DIY Projects

You never know when you're going to need a circle. Maybe you're building a toy car that needs wheels, a clock face, or a high top for your breakfast nook. You could make a cutting board or a side table made from a cutting board with the modern side table IKEA hack. The good news is that it's relatively easy to cut perfect circles out of wood ... compared to crescents, ellipses, and quatrefoils, anyway). However, the ideal way to do it depends on how your workshop is equipped and what size circle you need to make. The best way is to use a bandsaw jig, described below. But there's a good chance you don't have a bandsaw, so we'll also give you some alternatives.
It also depends on how perfect your circle needs to be. You can make a beam compass out or tie one end of a string to a nail and the other to a pencil, draw your circle, and cut freehand with a tool like a jigsaw or even (shudder) a handsaw. If you only need a small circle and don't care about having a large hole in the center, you can buy a circle cutter attachment for a drill or drill press or use a hole saw. You can even get a circle-cutting attachment for a rotary tool, which is yet another genius way to use a Dremel around the home or workshop.
Make a bandsaw jig for cutting circles
Jigs are handy for everything from fine woodworking to framing out your basement DIY-style. A bandsaw jig for cutting circles is easy to use, easy enough to make, and capable of making small circles that would be impossible or terrifying with other approaches. The simplest bandsaw jig is made to rotate the workpiece against your blade, then rotate the bandsaw fence (or your saw's miter slot and a runner if you don't have a fence). It attaches a stop to the front of the saw so that the table portion of your jig — a flat piece of MDF or plywood that overhangs the saw's table — is held in position along two adjacent sides. Guiding the jig table along the fence or miter slot, cut a kerf into the table, stopping when your stop insists you do.
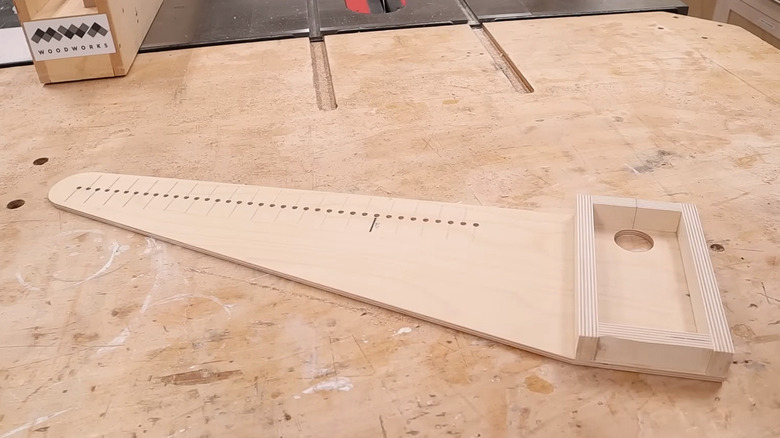
Now, draw a line perpendicular to this kerf from your blade to the edge of the jig table. Any measurement from your blade out will be the diameter of your wooden circle. Put a pin through the center where your workpiece circle will be and attach it at the halfway point of your diameter line (a finish nail with its head cut off works well for this). Using the jig is simple. Slide your jig into place on the bandsaw table, turn on the saw, and rotate your workpiece. Once you make it 360 degrees all the way around, you'll have a perfect wood circle.
Make a trammel for cutting circles
If you don't have a bandsaw, the next best approach is to use a jig to rotate a cutting tool in a circle on the workpiece. This type of jig is called a trammel, and you can use one with a plunge router or a jigsaw. You can buy router jigs for cutting circles, but it's easy enough to make your own. You anchor the trammel to the center of your circle at one end and attach your router or jigsaw at the other. The power tool rotates around that center pivot point, cutting your circle. The distance from the center point to the inside edge of your cutting blade or bit is your circle's radius. How you attach the cutting tool depends on what you're using. Typically, you'd trace a router's base plate onto the trammel so you can attach it; for a jigsaw, the standard approach is to make a scrap wood cradle to hold the saw in place.
The trick to doing this successfully lies in how you start the cut. It's ideal to cut your workpiece to a square with sides the same length as the diameter of your intended circle so that you can just start the jigsaw along the middle of one edge. Alternatively, you can drill a pilot hole on the outside edge of your circle and start the jigsaw blade there.