These IKEA Hacks Turn A Simple Throw Blanket Into A Custom Design Piece
Customizable items always bring more of your personality into any room, and DIY TikTok trends are all about creating masterpieces with items you either already own or can find for budget-friendly prices. From cross-stitching an IKEA table to upcycling a BILLY Bookcase, IKEA pieces are ideal for crafting. A new IKEA Blanket DIY lets you upgrade your throw by sewing patterns into the fabric, adding corner pom poms, or even creating throw pillow covers. Whether you're a whiz with a needle or just want to try your hand at crafting, these clever hacks will give you a fun piece that is significant to your aesthetic and decor. Think of these IKEA blankets as a blank canvas — you can incorporate any pattern or addition you want, making them completely customizable.
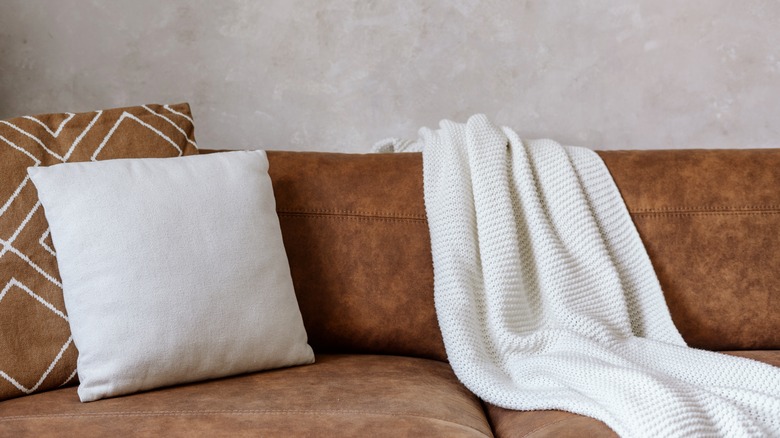
IKEA has a variety of throws and blankets you can choose from for your designs, so the first step is to find your "base." The IKEA HUMLEMOTT ($24.99) is a lightweight knit, and the fact that it's made from 100% recycled materials is a big bonus for those who like their items on the eco-friendly side. The HORNMAL basket weave blanket is made of recycled polyester and yarn and retails at only $19.99. The build of this throw allows for needlework (most likely with larger needles and yarn) or could have decorative additions sewn onto the corners. Finding materials that are easy to sew items onto or through is the key to picking a blanket you can craft with.
Add patterns, bobbles, or tassels with yarn
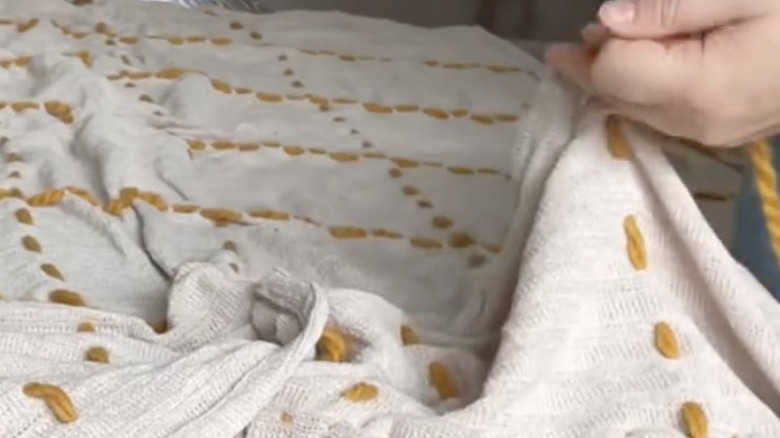
If you enjoy sewing patterns and designs into fabrics, this TikTok DIY shows how you can add color and texture to the IKEA HUMLEMOTT, and you don't need to be an absolute expert to try it. Pick up your favorite color yarn, then grab a pack of yarn needles to assist in building your pattern. Easy layouts include sewing long strips of yarn through the blanket vertically and horizontally, building a simple yet colorful motif throughout the throw's fabric.
Weave your yarn (which can be thick or thin depending on how much you want to show) through the top and underside in a straight stitch so it can be seen on both sides. The HUMLEMOTT comes in five colors, so depending on your purchase, you can find a yarn color to complement it. The finished product will be a chic, homemade throw that looks like you spent quite a bit more than the $24.99 you paid (before craft supplies, that is).
Not every IKEA blanket has to be a sewn-in masterpiece. By adding bobbles or pom poms onto the corners of a throw, you can upgrade it instantly. There are several ways to attach these ornaments to your blanket, but one popular DIY involves crocheting them to the knitted fabric. To create your own pom pom, you can purchase Crafters Square makers from Dollar Tree in person, or online if you don't mind buying in bulk. Use the pom pom maker to create your bobbles, then crochet or sew them to the corners of the IKEA HORNMALL.
Get creative with placement and colors
If you want to attach more on top of the blanket or along the edges, the HUMLEMOTT might be a better option since it doesn't feature any detailing besides the minimal texture of the throw. Chunky yarn makes for large, textured pom poms, and by tying a piece of yarn around the middle of your bobble, you have a way to attach it to your throw. Pull this piece tight with your crochet needle and tie it off with a knot or sew several loops to keep it secured. Your standard IKEA blanket will look like a high-end buy that you got at a knock-off price.
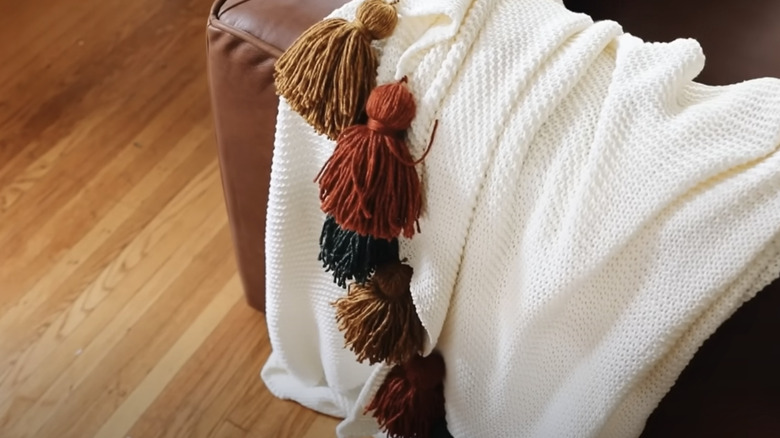
You can also play on the bobble look by switching these to tassels. To make your tassels, find the yarn in the colors you want to use and grab a frame or a piece of cardboard that you can wrap the string around. Thinner yarn will produce a different finish than the thick kind you would use for the above additions, but it comes down to personal preference. A standard 4x6 frame will work as your base, and you can simply wind the yarn around it 100 or more times to produce a bulky tassel. From here, use a solitary piece of string from the same ball to tie around the top of one end, and make sure to knot it several times.
Try turning your throw into a pillow
Use an X-Acto knife to cut open the other end of the wrapped yarn, so that these loose ends are opposite the tie. Your tassel should look like a miniature mop with a string hanging off the top. Use one or several pieces of yarn to create a "head" near the top of the tassel, about ½ an inch down, which produces a more structured shape. Next, use a crochet or yarn needle to thread a top string through the blanket material and tie it in several knots to secure. You can use these around the entire throw, or just in the corners.
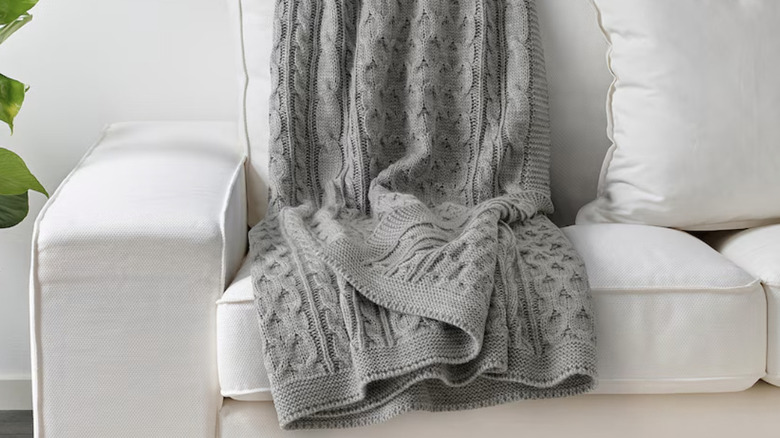
Another way to get creative with your IKEA throws is to cut them up and turn them into pillows. This trend started with an IKEA rug-turned pillow, but it can work with a blanket, too, and is a fun way to customize your cushions. Once you decide what size you want them, cut the blanket into two squares. The DÅRÖRT is a cable-knit material for $29.99 that goes well in a variety of settings and brings texture easily to your furniture. Sew two opposite ends of the blanket with a sewing machine. This should create a "tunnel" where you have an opening at each end. Flip the fabric inside out so the edges are turned inward. Sew up the remaining ends by folding one edge under slightly so it looks similar to those that were turned inside out. Leave a little opening to fill with Poly-fil, then sew up the remaining side with an "envelope" fold.