Repurpose This Garden Castaway Into A Stylish Tissue Holder
Cold season and allergy-prone spring can often mean lots of tissues around your house. While some boxes are pretty and geared toward blending in with the aesthetic of the room, just as many are not. They can be very unsightly, adding to clutter and not really pulling their weight design-wise. A great solution to this problem is seeking out other stylish containers to hide or house tissues. While many can be found at home stores in a variety of styles and shapes, you may not need to look further than your own garden for a great DIY solution that costs nothing. Discarded and unused planters can make great containers for tissues and are much prettier and style-conscious than the typical cardboard box.
Not only does turning these repurposed planters into tissue boxes save them from being thrown out in the trash, but they also provide a great free alternative to sometimes pricey covers and containers sold specifically to hide tissue boxes. They are also a great way to keep using a planter that's cracked, fragile, or a personal favorite indoors and out of the elements.
Creating a tissue holder from a planter
Planters are available in a variety of materials that help add beauty and texture to a space, like hand-hewn clay pottery, ceramics, terra cotta, aluminum, and marble. For best results, look for planters with mouths that are slightly narrower than the base where the tissues will be housed. This makes pulling tissues out easier. If you don't have any spare planters on hand, thrift stores, garage sales, and discount stores can be great sources for beautiful but inexpensive containers in all sizes and shapes.
To transform an old planter from a garden receptacle to a perfect berth for tissues, clean the planter thoroughly before use, removing any dirt, dust, or debris. Remove the stack of tissues in its original formation and place it inside the container, threading the top tissue through the opening. Smaller and medium-sized pots often work better for this than larger ones, providing a tighter fit that mimics the original packaging. For larger pots, you may need to add additional foam or packing material at the bottom to provide a booster for the tissues. For smaller openings, try dividing the stack of tissues in half or rolling the tissues to get them to fit inside.
Using and customizing your DIY tissue holder
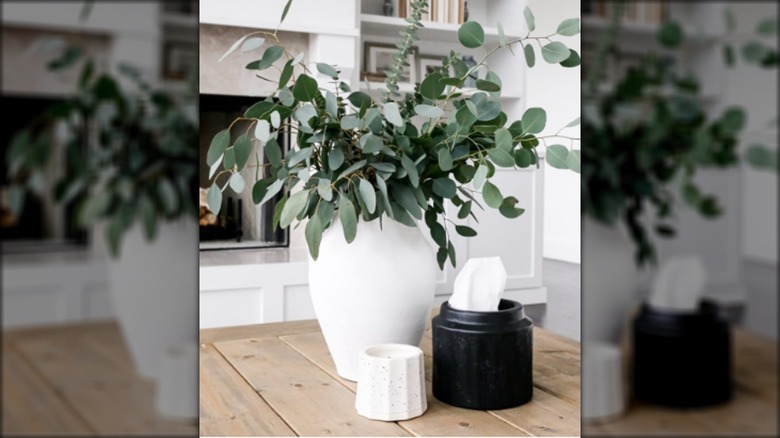
Place your upcycled tissue holder anywhere you find yourself needing tissues like your desk, nightstand, or vanity where the planter will blend far more seamlessly in with your decor than a cumbersome box. This hack also works with other receptacles like vases or decorative bowls with a smaller mouth and more spacious interior. Similarly, upcycled mason jars also make chic tissue holders created the same way. A great way to corral items on a bathroom vanity is to assemble a collection of pretty coordinated planters holding tissues, cotton balls, and other essentials on a tray to combat clutter and organize your bathroom.
There are many ways to customize the look of planters that are nondescript or have seen better days, including applying chalk paint or stone paint to the exterior. For a rustic look, wrap twine or rope around the outside of the planter and secure it with hot glue for a dose of texture. For plainer, more utilitarian planters, consider adding painted decorative accents or mosaic elements like stones or beads to the outside. With a beautiful planter, keeping tissues around the house becomes less of an issue.