Make Your Mini Lemon Tree Grow Like A Bonsai For Extra Space & Aesthetics
When life gives you a lemon (tree), turn it into bonsai. Translated literally to "tree in a pot" (via Virginia Cooperative Extension), bonsai is the art of shaping potted trees into contracted versions of their wild-growing selves. They're pruned to realistically mimic the vibe and character of a mature, graceful specimen while sustaining a short stature, keeping to the maxim: all small things pack a punch of elegance. Naturally, achieving the look isn't easy, as every inch of the tree, from buds, flowers, branches, foliage, trunk, and roots, must be proportionate to the tree's size. That's precisely why you mostly see sentinels like maple, wisteria, oak, and pine being trained into bonsai, as their structures lend more easily to the concept.
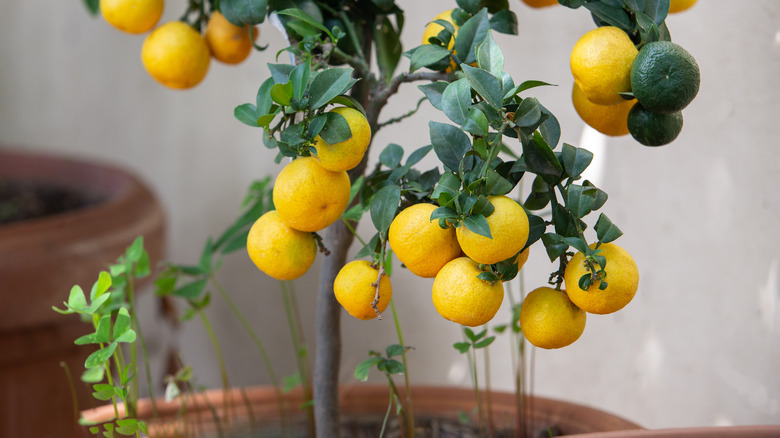
However, lately, lemon trees are having a moment, with several home gardeners converting their fruit-popping specimens into bonsai for reasons beyond aesthetics. Maturing to heights of 10 to 20 feet and spreading between 10 and 15 feet wide, lemon trees are massive space hoarders. Given that, and the obligation to winterize them indoors, as they're cold-sensitive (that's tropical species for you!), they're untenable in small yards. But as bonsai trees? They are splendid, although the odds of them fruiting aren't very high. But they smell nice and are worth a shot—who knows, you, too, might wind up with a specimen you can pass down to the next gen.
Essentials for the hack

While it isn't necessary to use dwarf trees, bonsai works better with young trees that naturally grow small leaves or at least have the potential to develop smaller leaves after training. For this reason, starting with varieties like Eureka lemon or Meyer lemon is ideal. Ensure the saplings are healthy and have a branching structure that you like. Alternatively, you can start with seeds but grow them for about three to five years (via Plant Paladin) before beginning their metamorphosis into a bonsai.
Choosing the best type of pot is essential, too. Newly created bonsai trees cannot be directly placed in shallow containers. Instead, you must first pot them in "training pots." To know the right size, measure your tree's length and calculate ⅔ of it. The final number will give you the width of the container. Also, they should be around 8 to 10 inches deep, or at least deep enough to enable the roots to be fully covered with soil. Also, look for the shape (oval, rectangular, or round) that best complements the lemon tree, but ensure it's unglazed on the inside and has optimum drainage holes, or you'll have to drill them yourself. Finally, gather tools like concave cutters or pruning shears, a hand rake, pliers, scissors (for stray cuttings), and a watering can. Finally, don't forget to buy bonsai soil.
Choose a leader
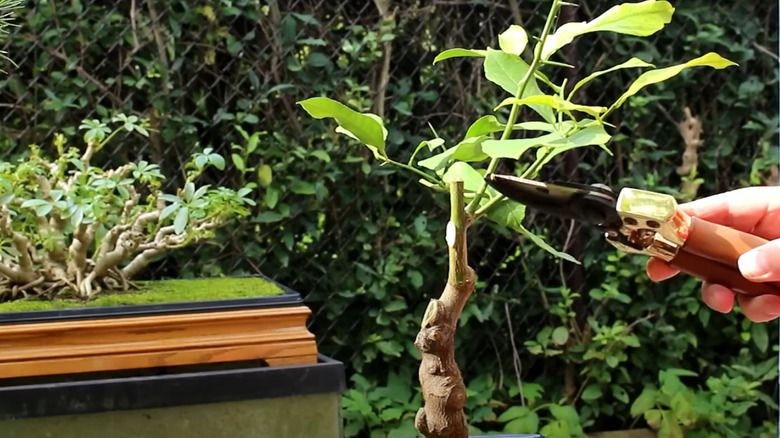
In bonsai trees, rather than growth, the trunk's shape and texture are key. Ideally, it should have a wide girth that tapers gradually as it grows upward without making the tree look asymmetrical. Simultaneously, it should have an interesting bark that shows signs of "having seen things," such as healed scars or blemishes—from cutting back, not diseases. That being said, chances are, your lemon tree's trunk has several branches growing out of it, exhibiting different stages of growth. Rather than keeping them all intact, pick a leader.
To do so, determine which side of your tree will be displayed. Ensure at least half of the trunk's bottom is visible sans the branches to get an idea of the tree's structure. Then, depending on the style you're going for, choose the healthiest vertical branch—or the one growing toward you if you aspire to keep a side branch. Since upright styles are easiest to follow, especially for those just starting their bonsai journey, we stick to that style for this DIY. So, once you're done selecting the leader, shear off its competition, stumps included. Aim for flush cuts; jagged cuts don't look as nice.
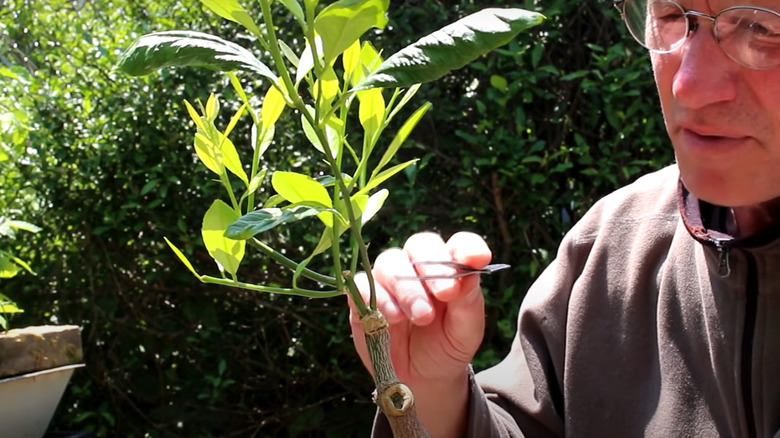
Defoliate
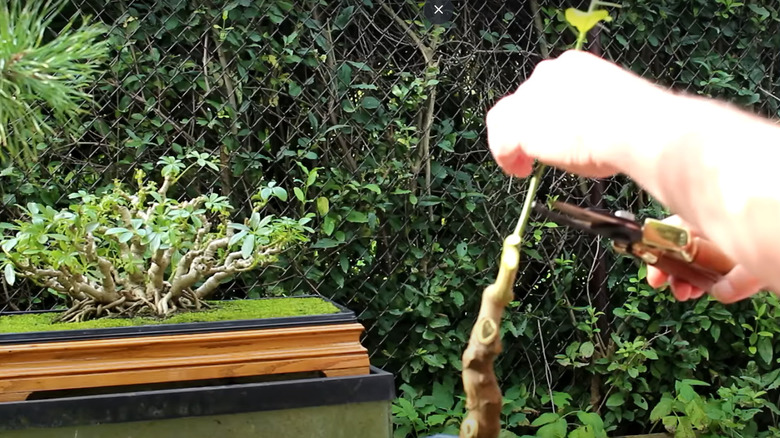
While pruning the rest of the branches out should take care of most leaves, you'll still be left with the ones on your leader. Examine the branch for leaf scars and cut the top foliage off after the first scar. By now, your lemon tree is pretty much reduced to a stump. But if you aren't sure the roots are completely healthy, leave out a pair of leaves so as to not inhibit the tree from making food.
Remove the lemon tree from its pot
For bonsai trees to survive, balancing their foliage and root growth is paramount. To achieve that, you must remove the lemon tree from its pot, prune its roots, and replant it later in a bigger container. That's precisely why it's best to carry out this hack in spring, which is when the plant is growing vigorously. Strip off any mulch covering the topsoil. Using a sharp edge, loosen the soil from the edges of the container to take the whole tree out without damaging the roots.
Comb out the roots
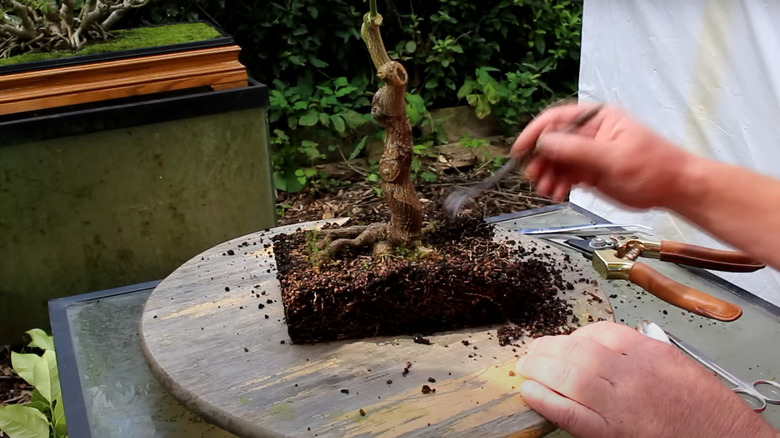
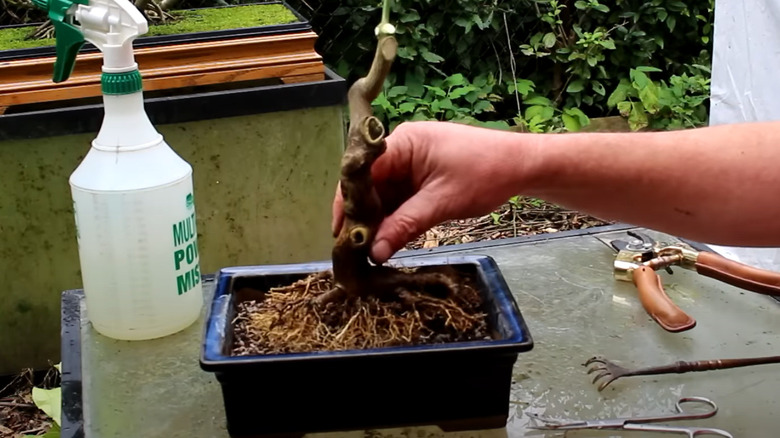
Once the lemon tree is out, inspect the growth of its roots. Ideally, they should fill out the soil, showing no signs of girdling or being root-bound. But if they do, you'll have to trim them out (this comes later). Starting at the top, tease the soil out of the roots by combing them radially with a hand rake, meaning that you'll be combing the roots out, away from the base of the tree. This will minimize the chances of root tearing while breaking apart any intersecting roots. Repeat the process on all slides. Afterward, turn over the lemon tree so the leader faces down or sideways, easing your approach to the root flare's bottom. Again, comb the soil out.
Wash the roots
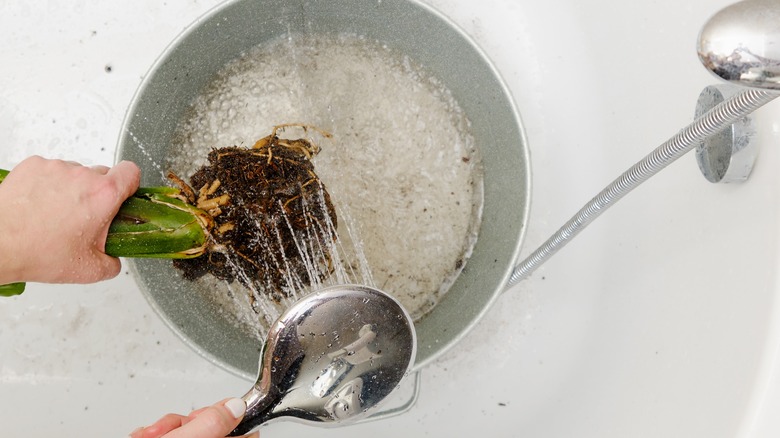
After you've ensured the roots are healthy and growing radially, wash them. To do so, dunk them in a water container. Swish them around a few times until all the dirt, debris, and soil are out. Cleaning the roots helps clarify their structure, making it easier to give them their (very due) haircut. Moreover, it keeps your cutters from dulling sooner, as they aren't brushing against errant soil particles.
Prune the roots

On to the most critical part: root pruning. As mentioned above, your lemon tree's roots should spread out radially; the ones going willy-nilly and tangling with other roots aren't welcome. This is, of course, assuming they aren't exhibiting any side-heavy growth because then you'd have to try to equalize both sections, coaxing the growth to become more even. Start by lightly misting the roots with water. Then, look for those protruding out at an angle or growing sideways and trim them out. Do the same for any overlapping or bulging roots.
Go harder on the thicker roots since it allows their smaller counterparts more leeway to develop. Moreover, it's better to have multiple smaller roots rather than a standalone thick root because it enhances water retention. Next, flip the lemon tree upside-down and take out the strands that would be growing straight down in the pot or in crosshairs with each other. Also, look for any kinks and signs of disease, such as rot—lemon trees are prone to contracting root rot when not cared for properly. Always make horizontal cuts to keep the roots flowing. Prune until you've got a flat base of lean, healthy surface roots.
Prepare your pot
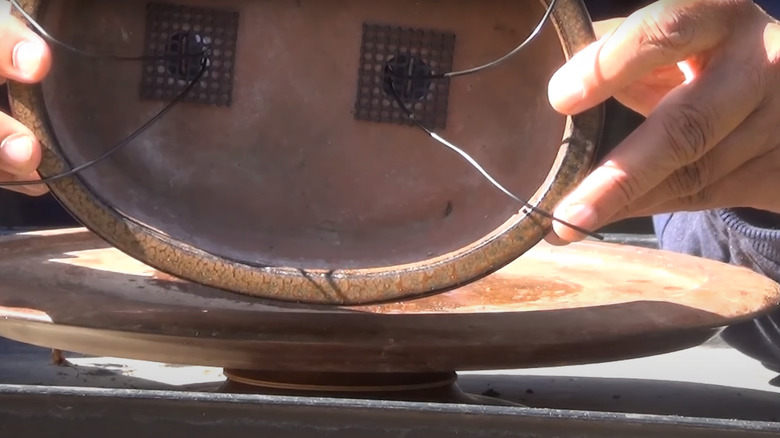
To keep the potting mix from pouring out, cover the drainage holes with a wire mesh. Secure the mesh with a 2-millimeter thick wire and fold the wire ends over the pot's bottom. If you're working with a circular container that only has one drainage hole, cut out 2 inches of a 3-millimeter (thicker) wire—go longer if the hole is bigger. Then, cut a pair of 2-millimeter wires to length and fold them over in a U-shape around the 3-millimeter wire.
Stick the wires up through the drainage hole, place them in the wire mesh, and fold the wire ends to the pot's sides afterward. However, if you feel your tree is unlikely to stay in its place, don't fold the wires just yet. Use them to fold over the root ball after you've topped up with bonsai soil.
Tip in bonsai soil
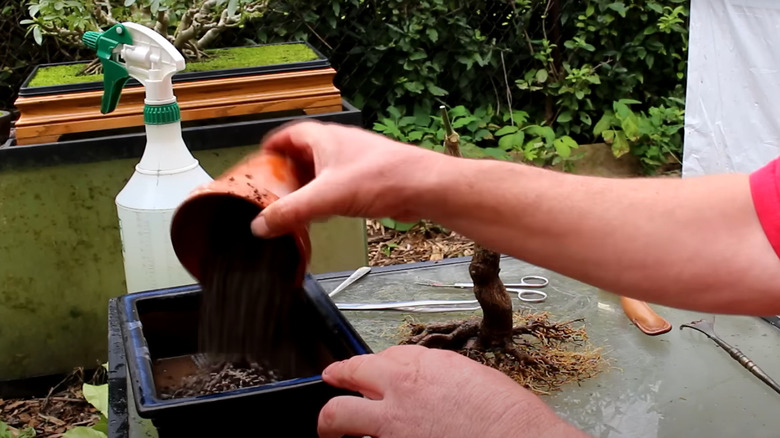
With the mesh in place, add fast-draining bonsai soil within 1 inch of the pot's top edge. You can DIY your mix by combining equal parts of turface and perlite. But sift out larger granules by passing the mix through a sieve. Alternatively, use a mixture containing organic compost, sand, and peat moss in a 1:1:1 ratio.
That being said, remember, bonsai trees survive in most mediums, but the best mix for them would vary based on the temperature, rain, pot size, and irrigation schedule. For instance, some prefer using 100% Akadama soil or blending Akadama with lava volcanic clay and pumice (Akadama is a clay-like, mined material popular in Japan as a potting medium for bonsai but can be expensive). Regardless of your choice, avoid using garden soil as it retains more water, raising the risk of root rot.
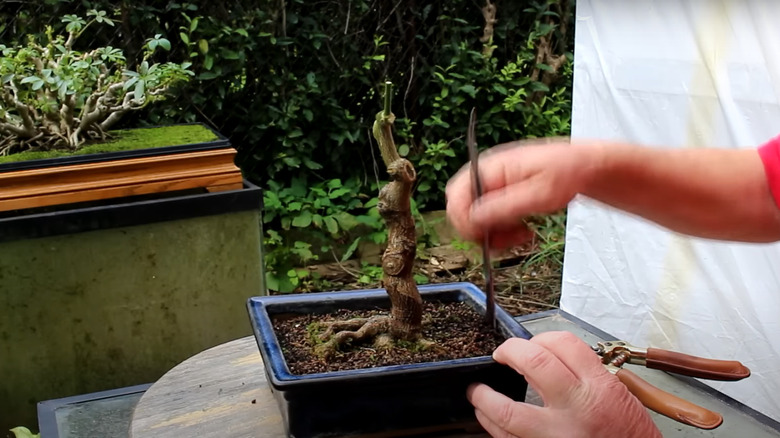
Repot the lemon tree
Mist the roots again and lightly place the lemon tree in the pot. If there are any flying roots, clear them out and rake them again. Generally, it's good practice to complete all pruning before affixing the tree, as it lowers the risk of roots getting dislodged later. Hold the container at eye level and arrange the tree slightly off-center, meaning that if the branches are weightier or leaning to the right, move the trunk to the left to give off the impression of an asymmetrical bonsai tree. Also, don't lay the tree too deep, and keep a few surface roots exposed above the soil line for better aesthetics.
Finally, comb the roots again to ensure they spread radially. Top up with the potting mix and firm it up to eliminate all air pockets. Additionally, layer it up with moss, gravel, or pebbles to dial up its visual appeal. This further helps in keeping the lemon tree rooted. But if you're still worried about the tree staying in place, run the extended wire through the root ball.
Water the bonsai lemon tree
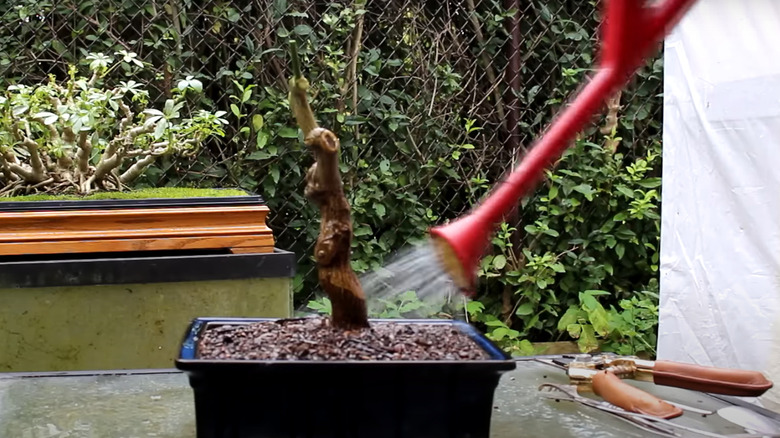
With the root flare undergoing such a traumatic experience, thanks to the aggressive pruning, thorough watering is necessary. Gently drench the soil until you see run-off. Alternatively, set the pot in a container of water. Wait for the water to soak into the roots through the drainage hole. Remove the pot from the tub when the potting medium appears fully saturated. Going forward, check the soil daily and irrigate whenever the top inch of soil feels dry.
Ongoing maintenance
After you've repotted your bonsai, put it in a dry spot out of sun for two to three weeks. Thereafter, move it to a sunny window. Spread a granular fertilizer—any houseplant fertilizer at ¼ to ½ strength works—every month while it's posting vigorous growth. However, lower the irrigation frequency to once a week and avoid fertilizer application during the winter. Also, stop pruning by mid-August and let the tree go dormant. Keep an eye out for pests like scale and spider mites.
Come spring, repot the lemon bonsai in a slightly bigger container. Trim any jutting limbs, and pinch off any suckers developing on the exposed trunk—or take them down using pruners if they've grown too large to easily pinch. If you want to shape the branches into a particular design, stop watering the day before and anchor them using an annealed copper or aluminum wire. Start at the bottom and make your way up. Use foam pads for particularly fragile branches. Don't bind them too tightly to avoid snapping the limbs. Remove the wires after the growth season is over. Remember, pruning is far easier on the tree than wiring, so stick to the former route whenever you can.