Light Up Your Home Decor With This Easy Dollar Tree DIY
We may receive a commission on purchases made from links.
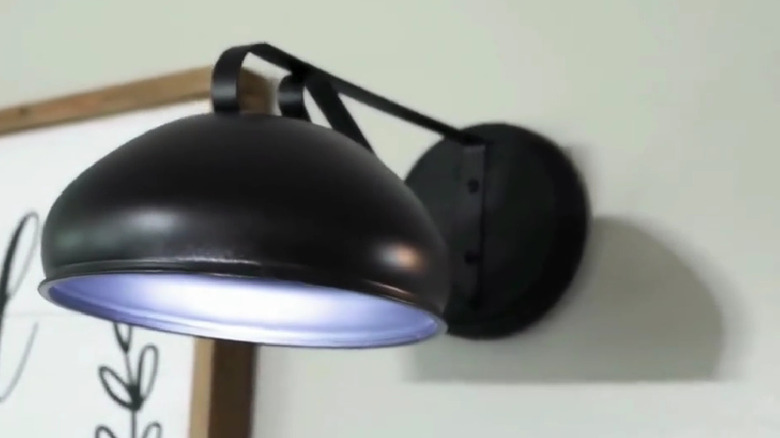
Finding lighting that looks stylish while being on a budget can be tricky, especially if you have a particular design in mind. Luckily, thanks to a hack by @dollartree.hacks on TikTok, you could create your own DIY Dollar Tree sconce light that will easily rival any store-bought one. Using a few items from the store, all you have to do is build it and attach it to your wall, and you'll have a fully working lamp to use anywhere around your home, whether that's near your desk, in your kitchen, bedroom, or even to decorate your mudroom.
In addition to looking the part, it's also helpful if you want to ditch the wires for a cleaner look, as using a puck light means that you won't have to connect it to an electrical outlet. This also means you can ditch any additional installation costs that would typically come with implementing new wall lighting — yet another extra benefit. All you'll need is an LED puck light from Dollar Tree for $1.25, a hanging plant bracket for $1.25, a hot glue gun, an electric drill and screws, Rust-Oleum Ultra Cover black primer, a clear plastic bowl for $1.25, two small pieces of wood veneer edge banding, and a circular piece of craft wood. You can grab some wood veneer edge banding off Amazon for $9.99.
How to build your Dollar Tree light DIY
Once you have everything on hand, begin the process of building it. First, you'll want to take your bracket and use your electric drill to attach it to your wooden piece of craft wood. Once it's secure, flip your plastic bowl upside down before using your hot glue gun to attach the other end of your bracket on the curved side. You may want to grab an old piece of scrap wood and prop it underneath to hold it while it adheres. Now, cut two short pieces of your wood veneer, apply some glue with your glue gun, and add them over the end of your bracket where it meets the bottom of the plastic bowl. Once it's dry, go in with your black Rust-Oleum primer, which you can nab off Amazon for $6.99, and give the whole structure a generous coating before allowing it to dry again.
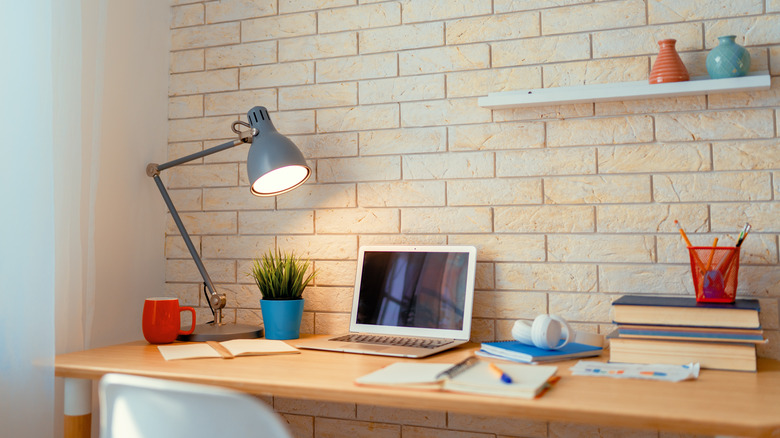
Now, you'll want to install your puck lights on the inside of your bowl where it's flat — just make sure to test that they work correctly beforehand. After this, all you need to do is secure it on your wall and use it just as you would a light! As a result, you should be left with some trendy home décor that you can use anywhere, such as near an office desk or in a playroom. However, there are other ways to customize it.
Switch up the color of your lamp
One way you can change the look of this DIY lamp up is to experiment with different colors, such as this rustic pink Rust-Oleum paint and primer off Amazon for $6.99 for a pop of color or this chalk paint version for $13.99 for a modern twist. However, your best bet is to pick something that matches the interior of your home. Alongside changing the color, you could also experiment with the design of your lamp, opting for different shapes of wood cutouts or changing up the "shade" part of the light. For example, you could use a fluted serving bowl from Dollar Tree for $1.25 or these square-style ones for $1.25.
You should note that when you apply Rust-Oleum, you should do so in an area with plenty of airflow or in an outside space to prevent contact or inhalation of the product. Another caveat to remember with this DIY is that you'll eventually have to change out the batteries for the puck lights, so it may be a bit fiddly for some individuals. The frequency at which you change them will all boil down to how often you use them, so if you're a heavy user, you may find yourself going through this process more frequently. Despite this, it's still a great way to decorate your home on a budget and achieve your desired style.